Intraday VWAP + Supertrend + RSI StrategyBased on Intraday VWAP + Supertrend + RSI Strategy
works fine
Indicadores y estrategias


Squeeze Pro Momentum BAR color - KLTDescription:
The Squeeze Pro Momentum indicator is a powerful tool designed to detect volatility compression ("squeeze" zones) and visualize momentum shifts using a refined color-based system. This script blends the well-known concepts of Bollinger Bands and Keltner Channels with an optimized momentum engine that uses dynamic color gradients to reflect trend strength, direction, and volatility.
It’s built for traders who want early warning of potential breakouts and clearer insight into underlying market momentum.
🔍 How It Works:
📉 Squeeze Detection:
This indicator identifies "squeeze" conditions by comparing Bollinger Bands and Keltner Channels:
When Bollinger Bands are inside Keltner Channels → Squeeze is ON
When Bollinger Bands expand outside Keltner Channels → Squeeze is OFF
You’ll see squeeze zones classified as:
Wide
Normal
Narrow
Each represents varying levels of compression and breakout potential.
⚡ Momentum Engine:
Momentum is calculated using linear regression of the price's deviation from a dynamic average of highs, lows, and closes. This gives a more accurate representation of directional pressure in the market.
🧠 Smart Candle Coloring (Optimized):
The momentum color logic is inspired by machine learning principles (no hardcoded thresholds):
EMA smoothing and rate of change (ROC) are used to detect momentum acceleration.
ATR-based filters help remove noise and false signals.
Colors are dynamically assigned based on both direction and trend strength.
🧪 How to Use It:
Look for Squeeze Conditions — especially narrow squeezes, which tend to precede high-momentum breakouts.
Confirm with Momentum Color — strong colors often indicate trend continuation; fading colors may signal exhaustion.
Combine with Price Action — use this tool with /resistance or patterns for higher probability setups.
Recommended For:
Trend Traders
Breakout Traders
Volatility Strategy s
Anyone who wants visual clarity on trend strength
📌 Tip: This indicator works great when layered with volume and price action patterns. It is fully non-repainting and s overlay on price charts.

Highlight Time Ranges - VN Timezone AbsoluteDefines specific time blocks as visual reminders to take a break and reset after long periods of chart analysis.
The indicator highlights two rest periods in Vietnam time (GMT+7):
12:00 to 14:00 – lunch break
17:00 to 20:00 – dinner and evening rest

Volume PercentileThis Pine Script indicator highlights bars where the current volume exceeds a configurable percentile threshold (e.g., 80th percentile) based on a rolling window of historical volume data.
🔍 Key Features:
Calculates a -defined volume percentile (e.g., 75th, 80th, 90th) over a rolling window.
Marks candles where current volume is higher than the selected percentile.
Helps detect volume spikes, breakouts, or unusual activity.
Works directly on the main chart window for easier analysis.
🛠️ Inputs:
Window Length: Number of bars used to calculate the percentile (default = 20).
Percentile: The percentile threshold to trigger a high-volume signal (default = 80).
🖥️ Visualization:
Displays a red triangle marker below bars with volume above the selected percentile.

Long-Leg Doji Breakout StrategyThe Long-Leg Doji Breakout Strategy is a sophisticated technical analysis approach that capitalizes on market psychology and price action patterns.
Core Concept: The strategy identifies Long-Leg Doji candlestick patterns, which represent periods of extreme market indecision where buyers and sellers are in equilibrium. These patterns often precede significant price movements as the market resolves this indecision.
Pattern Recognition: The algorithm uses strict mathematical criteria to identify authentic Long-Leg Doji patterns. It requires the candle body to be extremely small (≤0.1% of the total range) while having long wicks on both sides (at least 2x the body size). An ATR filter ensures the pattern is significant relative to recent volatility.
Trading Logic: Once a Long-Leg Doji is identified, the strategy enters a "waiting mode," monitoring for a breakout above the doji's high (long signal) or below its low (short signal). This confirmation approach reduces false signals by ensuring the market has chosen a direction.
Risk Management: The strategy allocates 10% of equity per trade and uses a simple moving average crossover for exits. Visual indicators help traders understand the pattern identification and trade execution process.
Psychological Foundation: The strategy exploits the natural market cycle where uncertainty (represented by the doji) gives way to conviction (the breakout), creating high-probability trading opportunities.
The strength of this approach lies in its ability to identify moments when market sentiment shifts from confusion to clarity, providing traders with well-defined entry and exit points while maintaining proper risk management protocols.
How It Works
The strategy operates on a simple yet powerful principle: identify periods of market indecision, then trade the subsequent breakout when the market chooses direction.
Step 1: Pattern Detection
The algorithm scans for Long-Leg Doji candles, which have three key characteristics:
Tiny body (open and close prices nearly equal)
Long upper wick (significant rejection of higher prices)
Long lower wick (significant rejection of lower prices)
Step 2: Confirmation Wait
Once a doji is detected, the strategy doesn't immediately trade. Instead, it marks the high and low of that candle and waits for a definitive breakout.
Step 3: Trade Execution
Long Entry: When price closes above the doji's high
Short Entry: When price closes below the doji's low
Step 4: Exit Strategy
Positions are closed when price crosses back through a 20-period moving average, indicating potential trend reversal.
Market Psychology Behind It
A Long-Leg Doji represents a battlefield between bulls and bears that ends in a stalemate. The long wicks show that both sides tried to push price in their favor but failed. This creates a coiled spring effect - when one side finally gains control, the move can be explosive as trapped traders rush to exit and momentum traders jump aboard.
Key Parameters
Doji Body Threshold (0.1%): Ensures the body is truly small relative to the candle's range
Wick Ratio (2.0): Both wicks must be at least twice the body size
ATR Filter: Uses Average True Range to ensure the pattern is significant in current market conditions
Position Size: 10% of equity per trade for balanced risk management
Pros:
High Probability Setups: Doji patterns at key levels often lead to significant moves as they represent genuine shifts in market sentiment.
Clear Rules: Objective criteria for entry and exit eliminate emotional decision-making and provide consistent execution.
Risk Management: Built-in position sizing and exit rules help protect capital during losing trades.
Market Neutral: Works equally well for long and short positions, adapting to market direction rather than fighting it.
Visual Confirmation: The strategy provides clear visual cues, making it easy to understand when patterns are forming and trades are triggered.
Cons:
False Breakouts: In choppy or ranging markets, price may break the doji levels only to quickly reverse, creating whipsaws.
Patience Required: Traders must wait for both pattern formation and breakout confirmation, which can test discipline during active market periods.
Simple Exit Logic: The moving average exit may be too simplistic, potentially cutting profits short during strong trends or holding losers too long during reversals.
Volatility Dependent: The strategy relies on sufficient volatility to create meaningful doji patterns - it may underperform in extremely quiet markets.
Lagging Entries: Waiting for breakout confirmation means missing the very beginning of moves, reducing potential profit margins.
Best Market Conditions
The strategy performs optimally during periods of moderate volatility when markets are making genuine directional decisions rather than just random noise. It works particularly well around key /resistance levels where the market's indecision is most meaningful.
Optimization Considerations
Consider combining with additional confluence factors like volume analysis, /resistance levels, or other technical indicators to improve signal quality. The exit strategy could also be enhanced with trailing stops or multiple profit targets to better capture extended moves while protecting gains.
Best for Index option,
Enjoy !!

GoatsADX)This TradingView indicator implements the Average Directional Index (ADX) along with Directional Movement Indicators (DI+ and DI-) to help traders identify trend strength and direction. It features:
Customizable length and ADX threshold inputs
ADX line colored white when rising and grey when falling for easy trend strength visualization
DI+ and DI- lines plotted with subtle black coloring for clean visuals
Background fills between DI lines and below ADX threshold to highlight key market states
Buy and sell signals plotted as arrows based on ADX crossing threshold with directional bias
Alert conditions for automated notifications on buy and sell signals

VWAP Divergence | Flux ChartsVWAP Divergence indicator by FluxCharts turned strategy, with trailing stop-loss capabilities. Will give entry signals for Divergences'. Also has calculations for positions.

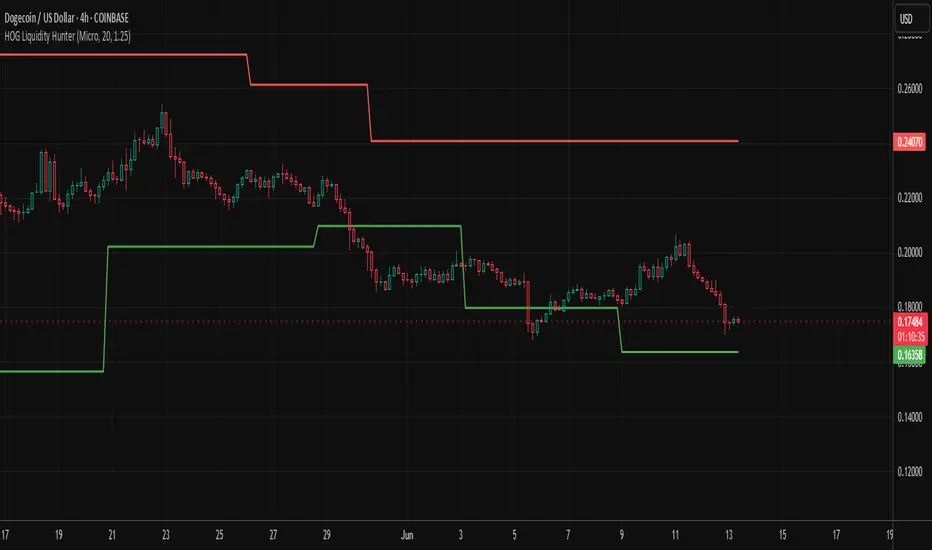
HOG Liquidity HunterHOG Liquidity Hunter – Pivot‑Based Liquidity Zones
📌 Overview
Plots dynamic and resistance zones on swing pivots with an ATR‑based buffer. Anchored only when pivots are confirmed, the zones stay close to current price levels—ideal for spotting liquidity runs or traps.
🔧 How It Works
Detects swing highs and lows using ta.pivothigh() / ta.pivotlow() with a ‑defined lookback.
After a pivot is confirmed, calculates BSL/SSL zone = pivot ± (ATR * margin).
Zones update only on confirmed pivots—no repainting on open bars.
⚙️ Inputs
Lookback: bars to confirm pivots (e.g. 10–20).
ATR Margin Multiplier: buffer width (e.g. 1.25).
✅ Benefits
Structure‑focused: Zones align with real swing points.
Responsive yet stable: Tight ATR margin keeps zones precise, only updating on valid pivots.
Clean visuals: Two uncluttered zones—easy to interpret.
🛠 How to Use
Detect near‑zone bounce entries or exits on 4H/1D charts.
Combine with trend or volume indicators for stronger setups.
Use zones to identify potential stop‑run, liquidity re‑tests, or range turns.
⚠️ Notes & Disclaimers
Zones base off historical pivots; may lag until confirmed.
No future-looking data—relying entirely on closing bar confirmation.
Use alongside a complete trading framework; this is not a standalone signal.
DAYTRADE GPT StrategyThis is the DAYTRADE GPT Strategy — built for disciplined intraday traders aiming to grow small capital into serious gains through calculated, high-probability trades.
🔍 Strategy Overview:
- Combines Bollinger Bands, RSI, Stochastic RSI, and Volume Spike detection for precise entries.
- Auto-detects optimal LONG and SHORT positions.
- Built-in Stop Loss and Take Profit using a configurable Risk/Reward ratio (default 1:2).
- Includes dynamic trailing stop logic to scale and protect profits once in the green.
🎯 Designed for:
- Scalping and short-term trades on crypto or highly liquid assets.
- Traders who scale positions as profits increase.
- High-frequency setups backed by volume confirmation.
💡 How It Works:
- Long when price is outside lower BB, RSI < 40, Stoch RSI oversold, and volume spike detected.
- Short when price is outside upper BB, RSI > 60, Stoch RSI overbought, and volume spike detected.
- Uses trailing stop once profitable to lock in gains as price climbs.
- Fully customizable: risk ratio, trailing %, and indicator sensitivity.
📈 Goal: Turn consistent setups into strategic wins. Ideal for those growing s from $100 toward $100K by December through disciplined trade management.
Let the algorithm handle entry/exit while you focus on execution. Adjust settings for your market.
#Crypto #DayTrading #Scalping #PineScript #Strategy

Volume Velocity by TenozenA new indicator is here!
Volume Velocity (VV) is designed to help identify whether the market is likely to trend or move sideways. When VV drops below 0, it suggests weak volume momentum, which often leads to choppy or range-bound price action. Conversely, a positive VV typically signals a stronger market drive, potentially indicating trend formation. (Strong reminder! Volume data quality is crucial! I suggest using volume data from futures market!)
VV is calculated using Kalman filter concepts; adapting to the state, covariance, and predictions over time, using matrix-based calculations.
To be honest, it's quite a complex method, and I’m still learning as I go. The current version is based on a translated formula that I personaly modified into Pine Script.
I’d really appreciate any insights or ideas you guys might have! Maybe there’s something I missed or a new approach I could try! Ciao!

ORB 15min + Entry + SL + TP at 2R15MIN ORB
- ORB high & low
- Entry above/below 5MIN candle close outside range
- SL above/below 5MIN break-out candle
- TP at 2R


GoatsMACDThis is a multi-layered trend scalping tool that combines MACD cross signals with dynamic trend filters including Bollinger Bands, EMA clouds, and VWAP for clearer trend identification and trade timing.
🔍 Features:
MACD Cross Dots: Tiny dots mark MACD bullish and bearish crossovers directly on the oscillator pane.
Customizable MACD Settings: Toggle between EMA or SMA calculation for MACD, with adjustable fast/slow lengths and signal smoothing.
Bollinger Bands Overlay: Optional 420-period BB with 0.5 standard deviation for mean reversion and volatility compression.
Triple EMA Clouds:
Cloud 1: EMA 21 vs 55
Cloud 2: EMA 89 vs 120
Cloud 3: EMA 200 vs 240
Each cloud changes color based on bullish/bearish EMA relationships to confirm trend strength and direction.
VWAP : Plots a session-based VWAP as an additional dynamic /resistance zone.
Alerts Included: Receive alerts on bullish or bearish MACD crossovers.
🧠 How to Use:
Use MACD dots to spot early trend shifts.
Confirm direction with the EMA clouds: trade only in alignment with cloud direction.
Use Bollinger Bands and VWAP for entries near key zones.
Ideal for scalping, trend following, or confirmation on multi-timeframe setups.
⚙️ Customizable Inputs:
Full control over MACD lengths and moving average type
Adjustable BB settings
Modify each EMA pair independently for all clouds

HOG QQE StackHOG QQE Stack – Advanced Momentum + Volatility “Stack”
🧠 Overview
HOG QQE Stack enhances classic QQE (a smoothed RSI variant) by layering multiple signal validation components: momentum, volatility, color gradient, and volume confirmation. This “stacked” structure produces clearer, more reliable signals than using RSI or QQE alone.
📊 Key Features
1. **Smoothed RSI Core**
Starts from a twice-smoothed RSI base (similar to QQE), reducing noise for cleaner trend detection. :contentReference {index=1}
2. **Fast & Slow Momentum Lines**
Generates dual lines for momentum crossovers—more precise than single-oscillator readings. :contentReference {index=2}
3. **ATR Volatility Filter**
Adds volatility-based bands around the fast line, helping filter out weak moves and false signals. :contentReference {index=3}
4. **Volume‑Validated Pulse Dots**
Pulse dots indicate when strong momentum aligns with volume spikes near overbought/oversold zones—highlighting high-confidence moves.
5. **Gradient Color Line**
The QQE line dynamically colors itself based on its position between OB/OS levels—intuitive and visually insightful.
6. **OB/OS & Midline Context**
Includes fixed 70/50/30 reference lines for quick momentum benchmarking.
7. **Layered Signal Strength**
By stacking momentum, volatility, gradient, and volume, the indicator provides multi-tiered confirmation—hence the “Stack” name.
8. **Repaint-Safe & Minimalist**
Plots only confirmed data—no repainting. The visuals are clean and easy to read.
🎯 Application
- Monitor fast/slow momentum crossovers *within* the volatility band for confirmed trend shifts.
- Use pulse dots to confirm strong movement backed by volume.
- Ideal for 4H/Daily charts, especially when used with HOG Super Trend or Liquidity Hunter.
- OB/OS levels (70/50/30) serve as guides for potential reversals or continuations.
⚙️ Inputs
- RSI Length
- QQE Smooth Factor
- WAE Length & Multiplier
- Overbought & Oversold Levels (default 70/30)
⚠️ Notes
- Designed as a **confirmation stack**, not a standalone strategy.
- No repainting—uses confirmed bar values only.
- Fully original code—no copying.
- No guarantees of performance—use proper risk management.

Liquidity Rush (VWAP × Avg Daily Vol in Cr)Liquidity Rush SHOWS TRADED VALUE PER DAY.It shows how much rupee volume (turnover) is concentrating around VWAP, giving you a sense of institutional participation, volume weight, or momentum readiness.

PMZ's Triple Filter Trend Strategy {Darkoexe}This strategy is a rule-based trend and momentum trading system that combines three unique technical models into a single composite engine. It’s designed for traders who prefer well-filtered entries, limited noise, and clear trade structure.
🔍 Core Logic
PMZ’s Composite Strategy integrates the following systems:
✅ 1. ASO (Advanced Sentiment Oscillator)
Measures bullish vs. bearish dominance using custom formulas that blend intrabar pressure with group-range dynamics. Three calculation modes give flexibility in emphasis.
✅ 2. SSL Channel
A classic trend-following method based on moving averages of highs and lows. It helps filter out false signals and align trades with broader market direction.
✅ 3. MBI (Momentum Breakout Indicator)
Looks for breakouts above/below recent extremes. It acts as the final trigger mechanism when other filters are aligned.
Trades are only taken when:
A fresh ASO/SSL trend agreement occurs
A MBI breakout happens in the same direction
A recent crossover (bullish or bearish) confirms the signal
⚙️ Strategy Settings
Backtesting Toggle – Define start and end time for historical testing.
Take Profit / Stop Loss via ATR – Risk-managed exits using -defined ATR multipliers.
No Reentries – The strategy waits until the current trade is closed before opening a new one (no overlapping trades).
📊 How It Works
🟢 Long Entry: Triggered when all 3 modules turn bullish together, with confirmation from an ASO trend crossover.
🔴 Short Entry: Triggered when all 3 modules align bearish.
📉 Stop Loss / Take Profit: Calculated dynamically using ATR to adapt to volatility.
🔧 Customizable Inputs
ASO Period & Method
SSL Moving Average Period
MBI Breakout Lookback
ATR period + TP/SL Ratios
Backtest Date Range Controls
🛑 Disclaimer
This strategy is a technical tool and not financial advice. Past performance is not indicative of future results. Always forward test and evaluate performance in live or paper environments before trading with real capital.

Dual Donchian Channels Simple expansion of the Donchian Channels indicator to two different timeframes. This can be useful when using different channel breakout methods for entry vs close. Defaults are 20 days / 52 days.

HOG QQE CandlesHOG QQE Candles
📊 Overview
A lightweight overlay that visually reflects RSI/QQE dynamics through color-coded candles. Designed for traders who want quick insight into momentum shifts — without opening a separate oscillator .
⚙️ How It Works
• Calculates smoothed RSI using QQE-style EMA
• Colors candles green for Overbought (OB), red for Oversold (OS)
• Colors candles blue on midline cross up (bullish), orange on cross down (bearish)
• OB/OS levels and midline signals are fully configurable
• Optional toggle for highlighting midline crosses
🎯 Inputs
• RSI Length
• QQE Smoothing
• Overbought / Oversold Levels
• Toggle: Show Midline Cross Highlights
• Toggle: Color OB/OS Candles
✅ Benefits
• No subwindow clutter — signals directly on price
• Clear OB/OS candles help identify exhaustion
• Midline color shifts reveal fresh momentum early
• Makes RSI/QQE readable at a glance
• Works great as a visual enhancer for trend or volume-based systems
📈 Use Cases
• Spot trend exhaustion during strong moves
• Confirm entry/exit with RSI midline cross
• Layer with trend overlays (e.g., EMAs, Supertrend)
• Ideal for minimal or clean chart setups
⚠️ Notes
• Candle color precedence: Midline cross > OB/OS
• Signal strength varies by timeframe and asset
• Best used as a visual companion, not standalone entry trigger


